A quick overview of the {surveydown} R package for making markdown-based surveys with open-source technologies: Quarto, shiny, and supabase.
Let’s build this, who’s with me?
A quick how-to guide for making reports in Quarto with custom parameters, and a couple fixes for some current limitations.
I asked ChatGPT to write this blog post. Here’s what it came up with.
A brief introduction to the {renderthis} package for rendering {xaringan} slides to different output types (previously called {xaringanBuilder})
A simple monte carlo simulation of the expected number of survivors from the Squid Game bridge scene Contains Spoilers
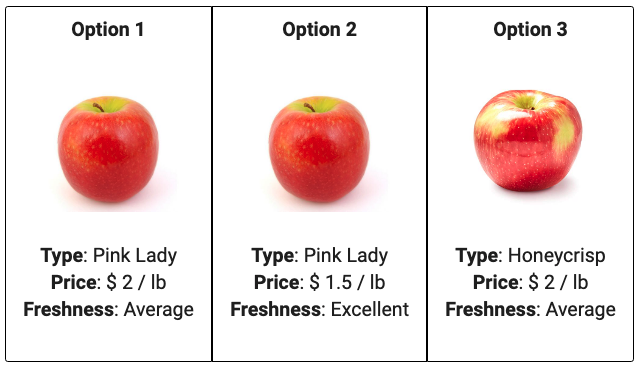
A how-to guide for using R to design and implement choice-based conjoint surveys using formr.org
My journey to find a more ergonomic (and useful) keyboard